Machine Embroidery for Beginners: A Complete Setup Guide
Learn how to set up your machine for embroidery success—from choosing the right needle and thread to picking the perfect fabric.
Machine Embroidery for Beginners: A Complete Setup Guide
Machine embroidery transforms plain fabric into stunning, personalized art—but getting started can feel overwhelming. Which needle do you use? What thread works best? Does your fabric choice really matter? This guide walks you through every step of setting up for embroidery success, so your first project comes out looking polished rather than puckered.
Why Machine Embroidery Is Worth Learning
Embroidery adds dimension, color, and personality to everything from tote bags to table linens. Unlike hand embroidery, machine embroidery is fast and consistent once you dial in your settings. The learning curve is real, but with the right tools and a little patience, you'll be stitching beautiful designs in no time.
**Pro tip:** The single biggest factor in embroidery quality isn't your machine—it's your needle and thread combination. Get those right first.
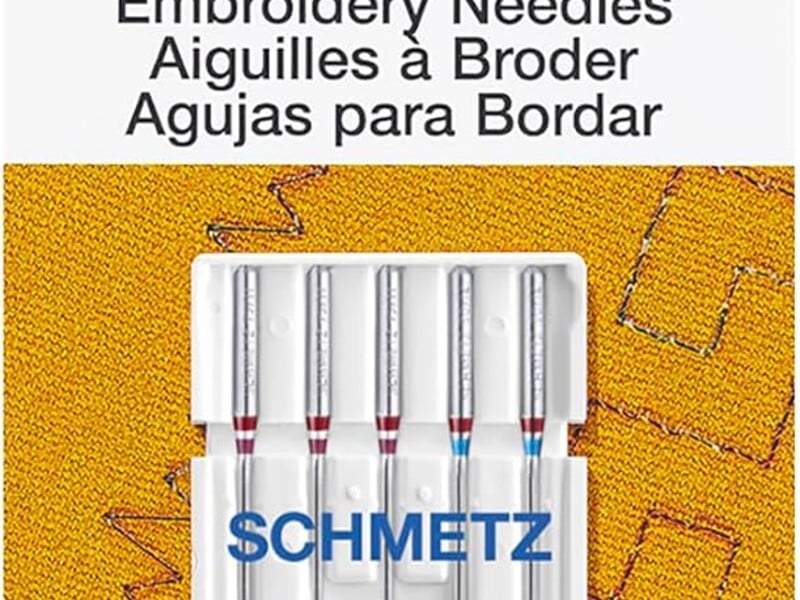
Step 1: Choose the Right Needle
Embroidery needles are purpose-built for decorative work. They feature a larger eye and a slightly ballpoint tip that guides thick or specialty threads through fabric without shredding fibers.
Schmetz Embroidery Needles (rated 4.5/5 by our testers) are the gold standard for machine embroidery. Priced at just $5–$10 for a multi-pack, they're an affordable upgrade that makes a noticeable difference in stitch quality. The larger eye accommodates rayon and polyester embroidery threads without fraying, and the scarf design reduces skipped stitches.
Available at [Amazon](https://www.amazon.com/dp/B004XK4Y8C?tag=smarterfabric-20)
Change your needle every 8–10 hours of stitching. A dull needle is the #1 cause of thread breaks and uneven stitches.
Step 2: Select Your Thread
Thread choice dramatically affects the look and durability of your embroidery. For machine embroidery, you have two main options:
For beginners, Gütermann Polyester Thread is an excellent starting point. With a quality rating of 4.8/5 and a durability score of 90/100, it's one of the most reliable all-purpose threads on the market. At $3–$6 per spool, it's budget-friendly enough to stock up on your most-used colors.
Available at [Amazon](https://www.amazon.com/dp/B07CWCNQMC?tag=smarterfabric-20)
Thread weight matters: Most machine embroidery uses 40-weight thread in the needle and 60-weight bobbin thread. Gütermann's standard polyester works well for practice runs and simpler designs.
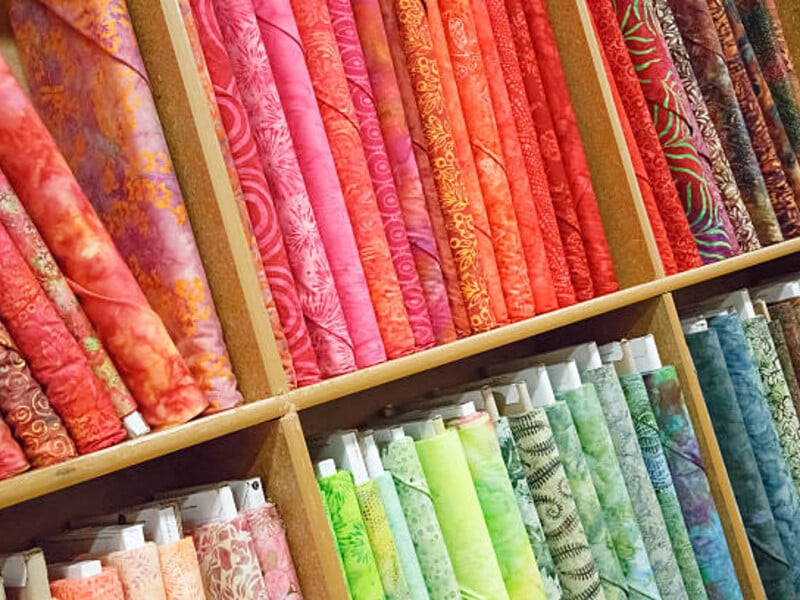
Step 3: Pick the Right Fabric
Not all fabrics embroider equally. Tightly woven, stable fabrics hold stitches cleanly; stretchy or loosely woven fabrics distort under the tension of dense embroidery.
Cotton Quilting Fabric by Robert Kaufman is the ideal beginner embroidery canvas. It's 100% cotton, tightly woven, and priced at $8–$15 per yard—affordable enough to practice on without guilt. With a quality rating of 4.5/5 and a durability score of 85/100, it holds up beautifully through washing and repeated use.
Available at [Amazon](https://i.etsystatic.com/25214360/r/il/44aead/7131227483/il_fullxfull.7131227483_1msk.jpg) | [Mood Fabrics](https://www.awin1.com/cread.php?awinmid=53817&awinaffid=2801410&ued=https%3A%2F%2Fwww.moodfabrics.com%2Fsearch%3Fq%3Dcotton) | [JOANN](https://www.joann.com/search?q=cotton+fabric)
Always use stabilizer behind your fabric. A cut-away or tear-away stabilizer prevents the fabric from shifting during stitching and is the difference between crisp embroidery and a puckered mess.
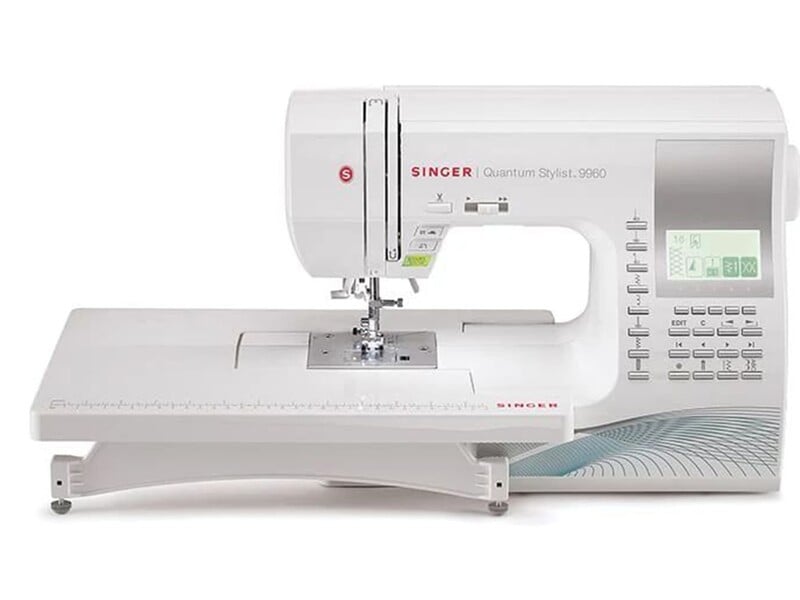
Step 4: Set Up Your Machine
If you're using a computerized machine with built-in embroidery stitches, you're already ahead. The Singer Quantum Stylist 9960 is a powerhouse for intermediate sewists stepping into embroidery. With 600 built-in stitches (including decorative and embroidery options), a quality rating of 4.4/5, and a price range of $350–$450, it offers exceptional value for the feature set.
Available at [Amazon](https://www.amazon.com/dp/B004RDH7Y8?tag=smarterfabric-20) | [Singer Direct](https://i.ytimg.com/vi/Dxt9x4o_Jjw/maxresdefault.jpg setup checklist:**
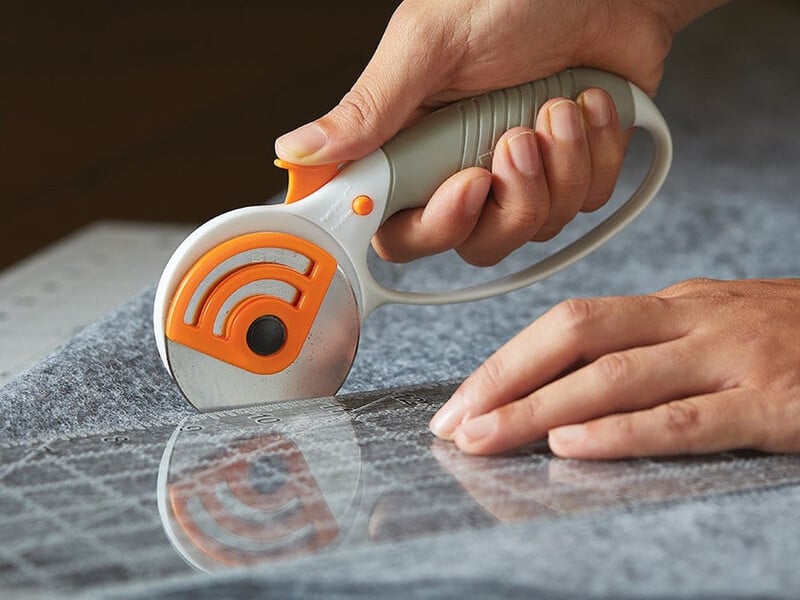
Step 5: Cut and Prep Your Fabric
Precise cutting makes hooping easier and keeps your design centered. A Rotary Cutter 45mm by Olfa (rated 4.7/5, priced $12–$25) gives you clean, straight edges on cotton quilting fabric with minimal effort. Pair it with a self-healing cutting mat for best results.
Available at [Amazon](https://www.amazon.com/dp/B000BNLLHW?tag=smarterfabric-20)
Cut your fabric at least 2 inches larger than your hoop on all sides. This gives you enough material to grip when hooping and prevents the fabric from pulling loose mid-stitch.
Step 6: Test Before You Commit
Always stitch a test run on a scrap of the same fabric and stabilizer before embroidering your final piece. Check for:
Adjust your settings based on the test, then proceed with confidence.
Quick-Reference Setup Checklist
Final Thoughts
Machine embroidery rewards preparation. Spend a few minutes getting your needle, thread, fabric, and machine settings right, and the stitching itself becomes the easy part. Start with simple fill designs on cotton quilting fabric, build your confidence, and then graduate to more complex patterns and specialty fabrics like silk charmeuse.
The tools don't have to be expensive—a reliable needle pack, quality thread, and stable fabric are all you need to get started. Happy stitching!
Products Mentioned in This Post
Singer Quantum Stylist 9960
Feature-packed computerized machine with 600 built-in stitches.
$350 - $450
Embroidery Needles
Large eye needles for decorative threads and embroidery.
$5 - $10

Gütermann Polyester Thread
Premium all-purpose polyester thread for machine and hand sewing.
$3 - $6
Rotary Cutter 45mm
Essential rotary cutter for precise fabric cutting.
$12 - $25
Cotton Quilting Fabric
Premium 100% cotton fabric perfect for quilting, crafts, and general sewing projects.
$8 - $15
Want deeper dives?
Check out our expert-written guides for comprehensive fabric and sewing knowledge.
Found this helpful? Share it with your sewing community!